
Flowers
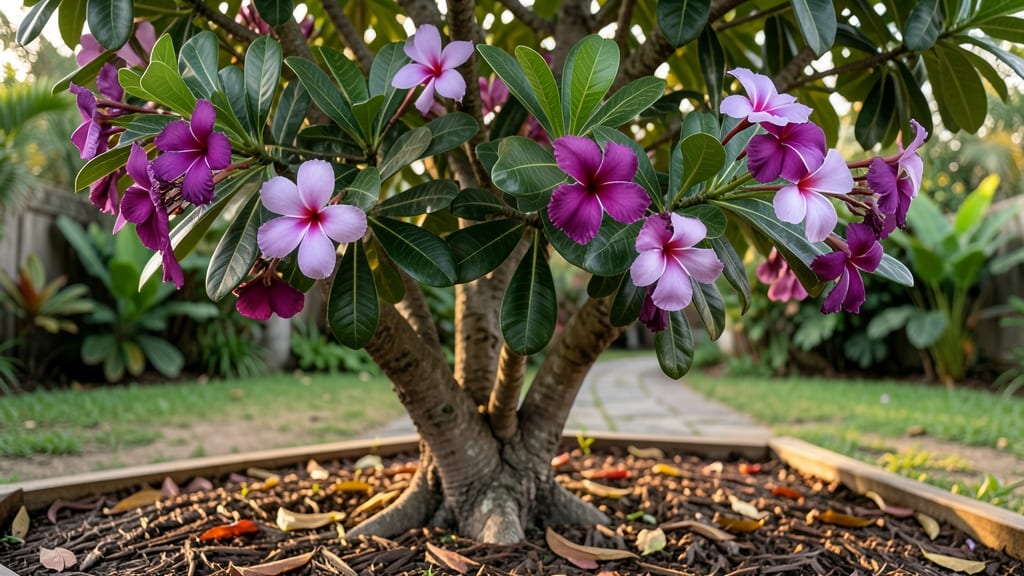
Growing a purple plumeria flower 🌺 from a simple cutting means bringing home a fragrant, tropical centerpiece that thrives with minimal fuss.
Imagine stepping into your garden and being greeted by the intoxicating fragrance of vibrant purple plumeria flowers—now you can make that dream a reality by growing these stunning blooms from simple cuttings.
These plants love full sun and well-draining soil, making them perfect for containers or sunny garden spots in Zones 10-12 (or frost-free areas).
From propagation to pruning, I’ll walk you through every step to ensure your plumeria grows lush, blooms bountifully, and fills your space with that signature sweet scent.
How to propagate purple plumeria flowers from healthy cuttings
Propagating purple plumeria flowers from cuttings is one of the most rewarding ways to expand your garden with these fragrant beauties. Unlike seeds, cuttings preserve the parent plant’s traits, including vibrant purple blooms and intoxicating scents.
With the right timing and techniques, you’ll have thriving plumeria plants in just a few months. The key lies in selecting healthy cuttings, using the right rooting medium, and providing optimal growing conditions.
Plumeria cuttings root best during the active growing season, typically in late spring or early summer when temperatures are warm and days are long. This timing ensures your cuttings have enough energy to develop roots before dormancy sets in.
If you’re in a frost-free zone, you can propagate year-round, but spring remains the ideal window for most gardeners. Gather your tools—sharp pruners, rooting hormone (optional), and a well-draining medium—and let’s get started!
Step-by-Step Guide to Propagating Purple Plumeria Cuttings
- 1 Select Healthy Cuttings: Choose wooden stems (not green) that are pencil-thick and about 12-18 inches long. Look for stems with 3-5 leaf nodes and no signs of disease. Use sterilized pruners to make clean cuts just below a node.
- 2 Prepare the Cuttings: Trim the leaves to half their size to reduce moisture loss. Remove any flowers or buds, as they’ll drain energy from root development. Let the cut ends callus over for 1-2 hours by placing them in a dry, shaded area.
- 3 Choose a Rooting Medium: Use either perlite, sphagnum moss, or water. For perlite, mix it with coarse sand (1:1 ratio) for better drainage. If using water, place cuttings in a jar with 2-3 inches of water, ensuring only the nodes are submerged.
- 4 Plant the Cuttings: Insert the callused end of the cutting 2-3 inches deep into the perlite mix or place it in the water jar. For perlite, firm the medium gently around the stem. If using moss, keep it moist but not soggy—plumeria hates waterlogged roots.
- 5 Provide Ideal Conditions: Place cuttings in a warm, humid environment with bright, indirect light. Avoid direct sun, which can scorch tender new growth. Maintain humidity by covering with a plastic bag or using a humidity dome. Water the perlite mix lightly every 2-3 days or change the water weekly if using jars.
- 6 Encourage Root Growth: After 4-6 weeks, check for roots by gently tugging the cutting. If resistance is felt, roots have formed! For water-propagated cuttings, roots will be visible through the jar. Once roots are 1-2 inches long, transplant to a well-draining potting mix.
- 7 Acclimate and Transplant: Gradually introduce cuttings to direct sunlight over 1-2 weeks to harden them off. Once established, transplant to a larger pot or garden bed with well-draining soil. Keep soil slightly moist but never waterlogged during the first few months.
Using perlite as a rooting medium offers the advantage of preventing rot while allowing airflow to the cuttings. Many gardeners swear by this method because it mimics the dry, airy conditions plumeria thrives in.
However, water propagation is simpler and works well if you’re patient—just remember to change the water regularly to prevent bacterial growth. Both methods yield healthy roots in about 6-8 weeks with proper care.
One common question is whether to use rooting hormone. While it’s not mandatory, it can speed up rooting by 20-30% if you’re in a hurry. Simply dip the callused end of the cutting into the hormone powder or gel before planting.
For organic gardeners, a natural alternative like cinnamon powder can also help prevent infection while promoting root growth.
Once your cut
Best purple plumeria varieties for fragrant blooms and growing conditions
If you're dreaming of a garden filled with fragrant purple plumeria flowers, you're in luck—these stunning varieties bring both beauty and intoxicating scents to any tropical-inspired space.
The 'Purple Majesty' and 'Lavender Swirl' stand out for their rich hues and heady fragrance, making them perfect for containers or garden beds in warm climates.
Purple plumerias thrive in full sun and well-draining soil, mimicking their native tropical environments. Whether you're growing them in containers or in-ground, these conditions are non-negotiable for lush growth and abundant blooms.
Let’s explore the top varieties and their ideal growing conditions to help you choose the perfect plumeria for your space.
| Variety | Fragrance | Sunlight Needs | Soil Type | Humidity |
|---|---|---|---|---|
| 'Purple Majesty' | Strong, sweet | 6+ hours direct sun | Well-draining, sandy | High (50%+) |
| 'Lavender Swirl' | Mild, floral | 6+ hours direct sun | Well-draining, loamy | Moderate (40-50%) |
| 'Royal Purple' | Rich, spicy | 6+ hours direct sun | Well-draining, gravelly | High (50%+) |
| 'Mauve Majesty' | Light, citrusy | 6+ hours direct sun | Well-draining, cactus mix | Moderate (40-50%) |
The 'Purple Majesty' variety is my personal favorite for its intense fragrance and deep purple blooms. This variety thrives in high humidity and well-draining soil, making it ideal for coastal gardens or containers near a water feature.
For a milder scent, 'Lavender Swirl' offers a softer floral aroma while still delivering stunning color.
When it comes to soil requirements, plumerias despise soggy roots. Amend your garden soil with perlite or sand to improve drainage, especially if you're planting in-ground. In containers, use a mix of cactus soil and perlite to keep roots happy and prevent rot.
A slightly acidic to neutral pH (6.0-7.0) is ideal for most purple varieties.
Don’t forget that humidity levels play a crucial role in plumeria care. In dry climates, mist your plants regularly or place them near a humidifier to mimic their tropical origins.
If you're growing in Zones 10-12, you can enjoy year-round blooms with minimal fuss, but in cooler zones, bring potted plumerias indoors before frost.
For the best results, pair your purple plumeria with complementary plants like hibiscus or bird of paradise to create a lush, tropical oasis. With the right variety and care, your garden will soon be filled with the sweet, intoxicating scent of purple plumeria in full bloom.