
How To
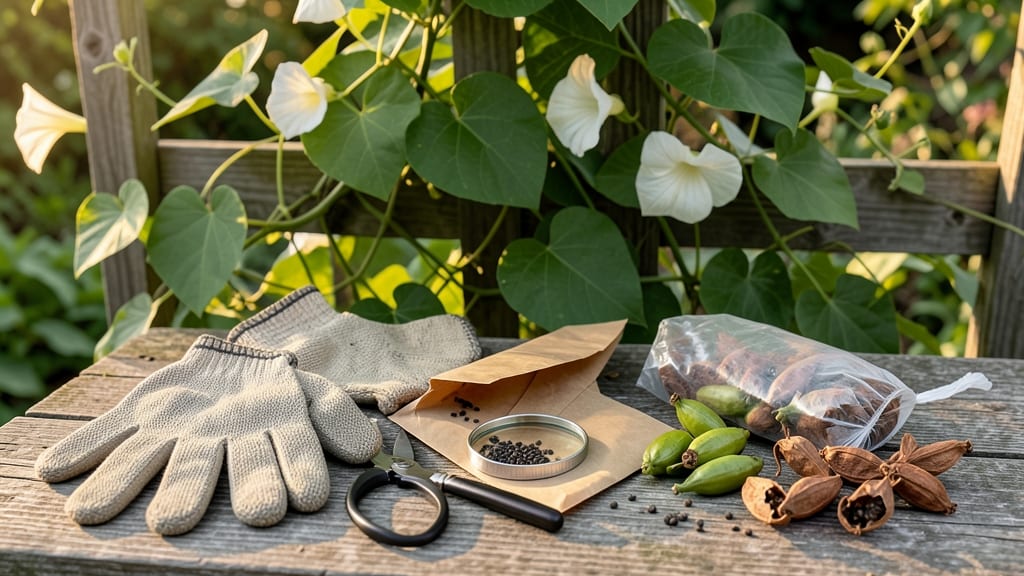
Harvest moonflower seed pods when they turn brown and begin cracking open naturally—this is the sweet spot for viable seeds and easy collection.
Picture this: you’ve spent months admiring your 🌙 moonflower vines glowing under the night sky, but now the real prize is hiding in those unassuming seed pods. Miss the timing, and you’ll either end up with damp, moldy seeds or wait too long and watch them scatter in the wind.
The key is knowing when those pods are ready—and how to act fast.
In USDA Zone 6a, that window typically opens in late summer, around August to September, when pods dry out after the flowers fade. But don’t rely on the calendar alone—look for the telltale signs: pods that rattle when shaken, split open slightly, and feel brittle to the touch.
These cues matter more than dates, especially if your summer was unusually hot or rainy.
Below, I’ll walk you through exactly how to spot the perfect pods, harvest them without losing a single seed, and store them for next year’s garden. No more guesswork—just a foolproof method for turning those moonlit blooms into a seed stash ready for planting.


How to identify moonflower seed pods ready for harvest
Moonflower seed pods transform from vibrant green to a rich, earthy brown as they mature, but knowing the exact moment to harvest can mean the difference between viable seeds and wasted effort.
These pods develop after your stunning white night-blooming flowers wilt, and their readiness is signaled by subtle yet unmistakable changes. Paying close attention to color shifts and texture will help you avoid harvesting too early—when seeds are underdeveloped—or too late, when they may scatter or lose viability.
Start by observing the pod's exterior. When fully mature, moonflower seed pods should be a deep, uniform brown, almost resembling dried parchment. This color change indicates the seeds inside have completed their development cycle. If you notice uneven browning or patches of green, the pod isn’t ready yet.
The transition from green to brown typically occurs in late summer to early fall, aligning with the plant’s natural lifecycle after flowering.
Texture is your next clue. Gently touch the pod—ready-to-harvest pods feel dry and papery, almost brittle to the touch. If the pod gives slightly when pressed or feels moist, it’s not yet mature. A fully ripe pod will also crackle or rattle when shaken lightly, signaling that the seeds inside are loose and ready for collection. This tactile cue is especially useful on cloudy days when visual clues might be less obvious.
Cracking patterns are another key indicator. Moonflower seed pods naturally split open along their seams as they dry, revealing the seeds inside. If you see partial splits or the pod beginning to open slightly, it’s time to act quickly before the seeds scatter. However, if the pod is still fully closed and firm, it’s not ready. Waiting until you see these cracks ensures you capture the seeds at their peak viability.
Regional timing matters. In USDA Zones 6a-9, where moonflowers thrive, pods typically mature between August and September. Cooler climates may experience a slightly delayed harvest, while warmer regions could see earlier readiness. Always monitor your specific plants, as microclimates can shift these timelines by a few weeks. If you’re in doubt, err on the side of waiting—overripe pods won’t harm the plant, but underripe seeds won’t germinate.
| Stage | Pod Color | Texture | Harvest Readiness | Action |
|---|---|---|---|---|
| Early Development | Green | Firm, moist | Not ready | Wait 4-6 weeks |
| Maturing | Green-brown | Slightly dry | Not ready | Monitor daily |
| Fully Mature | Deep brown | Dry, papery | Ready | Harvest immediately |
| Overripe | Brown-gray | Brittle, cracking | Too late | Seeds may scatter |
Avoid the temptation to harvest based solely on flower wilting. While wilted blooms signal the start of pod development, the seeds inside may take 6-8 weeks to fully mature. If you harvest too soon, you’ll end up with shallow seeds that won’t germinate.
To test readiness, gently squeeze the pod—if it resists slightly and feels hollow, it’s likely ready. If it feels soft or squishy, give it another week or two.
Weather plays a critical role in pod drying. Hot, dry conditions accelerate the maturation process, while humid or rainy weather can delay it or cause mold. If you’re in a region with frequent rain, consider harvesting pods slightly earlier than the color suggests, as excess moisture can reduce seed viability.
Always harvest on a dry day to prevent mold during storage.
One common mistake is assuming all pods on a plant mature at the same time. Moonflowers often produce pods in successive waves, so you may need to check your vines weekly once the first pods turn brown.
Keep a close eye on the oldest pods, as these will be the first to reach harvest readiness. If left unattended, they may split open and scatter seeds across your garden, reducing your yield.
Once you’ve identified the perfect pods, act quickly. Use clean, sharp pruning shears to snip the pods from the vine, leaving a small stem attached. Place them in a paper bag to allow airflow while preventing seeds from escaping.
Store the bag in a cool, dry place for 1-2 weeks to complete the drying process before processing the seeds.
Step-by-step guide to harvesting and processing moonflower seeds
Once you've identified your moonflower seed pods as ready for harvest, the next step is collecting them carefully to preserve seed viability. Use clean, sharp pruning shears or your hands to avoid damaging the delicate pods.
Work on a dry, sunny day to prevent moisture-related issues during processing. Remember, timing is everything—harvesting too late can scatter seeds naturally, while harvesting too early means immature seeds that won't germinate.
After collection, lay the pods on a paper towel-lined tray in a well-ventilated area. This step is crucial for drying moonflower seeds properly, as excess moisture can lead to mold or rot.
Keep them away from direct sunlight, which can overheat and damage the seeds. The drying process typically takes 7-14 days, depending on humidity levels in your region.
Step-by-Step Harvesting Process
- 1 Collect pods when they're brown and dry, gently twisting them from the vine to avoid stem damage.
- 2 Lay pods on a paper towel in a shady, dry location for 24 hours to prevent mold from residual moisture.
- 3 Crack open pods carefully with your fingers or a small hammer to release seeds. Avoid crushing them to maintain seed viability.
- 4 Remove debris by winnowing seeds in a paper bag or using a fine mesh sieve to separate seeds from chaff.
- 5 Store seeds in a paper envelope or glass jar with a silica gel packet to absorb moisture.
For long-term storage, place your moonflower seeds in an airtight container with a desiccant packet to prevent moisture buildup. Store them in a cool, dark place like a refrigerator or seed vault, where they can remain viable for 2-3 years.
Label your containers with the harvest date to track seed freshness—older seeds may have reduced germination rates.
If you encounter mold or pests during drying, act quickly. Move seeds to a drier location immediately and consider using a food-grade diatomaceous earth to eliminate pests naturally. For mold, reduce humidity by placing seeds near a dehumidifier or in a well-ventilated area.
Never store seeds with signs of mold, as this can compromise their viability.
After processing, test a few seeds by planting them in moist potting soil to verify germination rates. This step helps you assess the success of your harvesting and drying techniques before storing the rest. If germination is low, review your drying conditions or storage methods for potential improvements.
With these steps, you'll ensure a successful moonflower seed harvest that yields healthy, viable seeds ready for next year's planting. Happy gardening! 🌱🌾✂️