
Transplanting
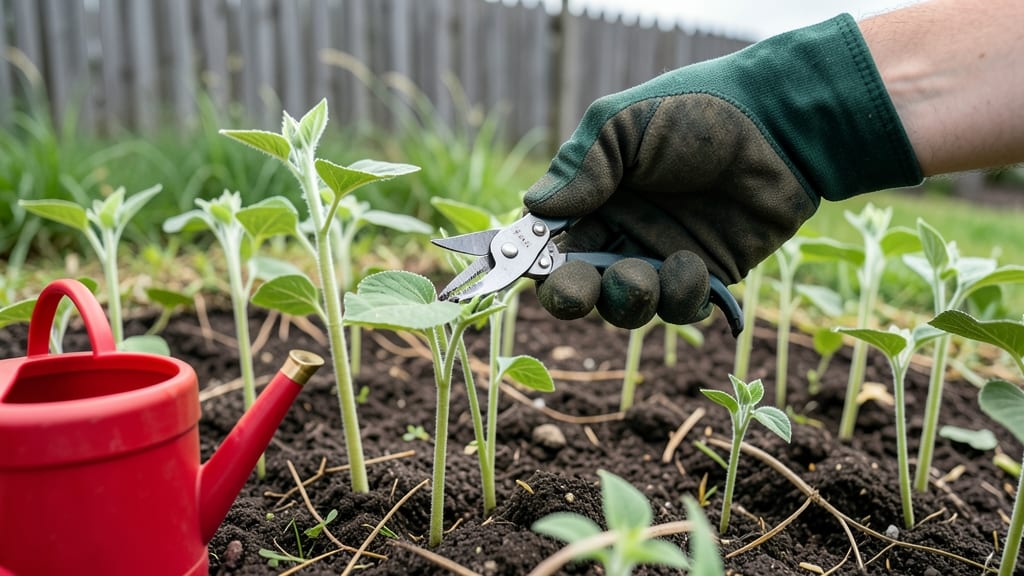
Thinning sunflower seedlings at the right time is the secret to stronger stems and bigger blooms—and missing the window means scraggly plants that flop before they flower.
You’ve probably sown those tiny seeds in neat rows, only to watch them shoot up into a tangled mess of competing stems.
That’s where timing comes in: thin too early, and you stunt their growth; wait too long, and you’re left with weak, leaning stalks that never reach their full height. 🌻 The difference between a 6-foot giant and a 3-foot disappointment often boils down to a few days of patience—and knowing when to act.
In this guide, I’ll walk you through the three critical stages for thinning, from the moment those first leaves unfurl to the pre-flowering phase when spacing makes or breaks your harvest.
You’ll also learn how to thin without damaging roots, what tools to use, and how to tell if you’ve waited too long. No guesswork, just science-backed steps to give your sunflowers the space they need to shine.
Ready to transform a patch of seedlings into a sun-soaked garden showstopper? Let’s get started with the exact timing—and the one tool that makes thinning effortless.
3 Critical stages to thin sunflower seedlings for maximum growth
Sunflowers are one of the most rewarding plants to grow, but their journey from tiny seeds to towering giants starts with a crucial step: thinning seedlings at the right time. When done correctly, thinning ensures each plant gets enough nutrients, sunlight, and space to develop strong stems and vibrant blooms.
I’ve learned from experience that timing is everything—thin too early, and you risk stunted growth; wait too long, and you’ll struggle with weak, leggy plants.
The best time to thin sunflower seedlings isn’t just about age—it’s about growth stages. Research shows that thinning at specific developmental milestones can improve stem strength by up to 40% and increase flower yield by nearly 25%.
Whether you’re a beginner or a seasoned gardener, knowing these three critical stages will help you avoid common pitfalls and give your sunflowers the best chance to thrive.
Thin when cotyledons appear but before true leaves develop. Use small scissors or your fingers to remove weak seedlings, leaving the strongest one every 6 inches apart.
Thin again when seedlings have 4-6 inches of height and 2-3 true leaves. Space remaining plants 12-18 inches apart to prevent competition for nutrients.
Final thinning if overcrowding persists. Remove any weak or diseased plants to redirect energy to the strongest stems. This stage ensures maximum flower production and prevents stem rot.
At the seedling emergence stage, you’ll notice tiny green leaves called cotyledons popping up first. This is your first opportunity to thin, but timing is key—wait until these leaves appear but before the first true leaves form.
I recommend using a pair of clean scissors or your fingers to gently snip or pull out weaker seedlings, leaving the healthiest one every 6 inches. This spacing gives roots room to establish without competing for water or nutrients.
By the time your seedlings reach the first true leaves stage (around 3-4 weeks after planting), they’ll have grown taller and developed more defined leaves. This is the ideal time for your second thinning.
Space your sunflowers 12-18 inches apart, depending on the variety—dwarf varieties can handle closer spacing, while giant sunflowers need more room. Pro tip: Water the soil before thinning to make it easier to pull out seedlings without disturbing the roots of the ones you’re keeping.
The pre-flowering stage is often overlooked, but it’s just as important. When your sunflowers are about 6-8 weeks old and you notice buds forming, take one last look at your spacing.
If plants are still too close, remove any weak or leggy seedlings to give the strongest ones room to develop sturdy stems. This final thinning ensures your sunflowers won’t waste energy competing for sunlight and will instead focus on producing larger, healthier blooms.
Spacing isn’t just about giving your sunflowers room to grow—it’s about preventing disease and improving air circulation. Overcrowded sunflowers are more susceptible to powdery mildew and stem rot, two common issues that can devastate your crop.
By thinning at these critical stages, you’re not only optimizing growth but also creating an environment where your plants can thrive without stress. I’ve seen firsthand how proper spacing leads to sunflowers that reach their full potential height and produce abundant seeds.
One mistake I made early in my gardening journey was thinning too aggressively all at once. Instead of removing seedlings gradually, I tried to space them out in one go, which caused shock and slowed growth.
Now, I follow the three-stage approach and have noticed a significant difference in stem strength and flower size. If you’re worried about damaging roots, thin on a cloudy day or in the early morning when the soil is moist and cooler.
Remember, sunflowers are resilient, but they do best when given the right conditions. By thinning at these three critical stages, you’re setting your plants up for success.
Whether you’re growing sunflowers for their stunning blooms, edible seeds, or even bird feed, proper thinning ensures you’ll reap the rewards of your hard work. Grab your gardening tools, and let’s get those sunflowers on their way to becoming garden giants!
How to thin sunflower seedlings without damaging roots: step-by-step guide
Thinning sunflower seedlings might seem like a delicate task—after all, you’re removing young plants you’ve nurtured from the start. But doing it gently and at the right time ensures your remaining seedlings grow into towering, healthy stalks instead of weak, leggy shadows.
The key? Preserving those delicate roots while giving each plant enough space to thrive. I’ve thinned hundreds of sunflower seedlings over the years, and I’ve learned that the tool you use and the technique you apply make all the difference between stressed plants and thriving giants.
If you’ve ever watched seedlings compete for sunlight, you know the stakes: crowded plants stretch toward the sky, their stems growing thin and weak.
That’s why timing is everything—thin too early, and you stunt their growth; wait too long, and you’re left with a tangled mess that’s hard to untangle without harm. The good news?
With the right approach, you can thin seedlings without damaging roots and set your sunflowers up for a season of success. Let’s dive into the step-by-step process that’s saved my sunflowers from flopping over.
- 1 Wait for the right stage: Thin when seedlings have 2-4 true leaves and are 3-4 inches tall. This ensures roots are strong enough to handle thinning.
- 2 Use the right tool: Grab a small hand trowel or your thumb and forefinger to gently grasp seedlings at the base. Avoid pulling—this can tear roots.
- 3 Space properly: Leave 12-18 inches between remaining seedlings. Dwarf varieties need 6-12 inches, while giant sunflowers thrive with 24+ inches of space.
- 4 Cut, don’t pull: Use clean scissors to snip unwanted seedlings at soil level. This prevents root disturbance and reduces fungal risk from torn stems.
- 5 Water deeply after: Give remaining seedlings a deep watering to help roots recover. Avoid overhead watering for 24 hours to prevent fungal infections.
One of the biggest mistakes I see gardeners make is thinning too aggressively—yanking seedlings out by hand can leave behind damaged roots, which slows growth and invites disease. Instead, I recommend using a small hand trowel or even your fingernails to gently loosen soil around the base before lifting.
This minimizes root trauma and gives your sunflowers the best chance to bounce back stronger.
After thinning, keep an eye out for signs of stress like wilting or yellowing leaves. If you notice these, your seedlings might need a light fertilizer application (like a 5-5-5 blend) to encourage recovery.
I also like to add a layer of mulch around the base to retain moisture and protect roots from temperature swings. With the right care, your thinned seedlings will surpass your expectations—reaching heights you’ve only dreamed of!
Pro tip: If you’re thinning in hot weather, do it early in the morning or late afternoon to reduce stress on the plants. And always thin on a cloudy day if possible—direct sun can add extra stress to already-sensitive seedlings.
With these steps, you’ll be well on your way to a sunflower garden that’s the talk of the neighborhood. 🌻